
Haven't we all experienced this? No matter how well set up our drones are, we often end up with shaky footage - especially when using action cams. This can often be exhausting to watch and takes the focus away from the actual content of the video. In this post, I'll look at all the ways you can make your footage as smooth as possible, no matter which cameras you use.
Yes, you read that right - no matter which camera you want to use. It doesn't always have to be a Gopro.
With "ReelSteady" you can easily correct your shaky footage and create a stable video.
There are numerous programs that you can use to stabilize your videos on your PC afterwards, but ReelSteady has released the ReelSteady GO software especially for GoPros. The special thing about it is that ReelSteady GO uses the data from the GoPro gyro sensor for stabilization. Since April 2022, Reelsteady has become the Gopro player + Reelsteady app, which is available in the Apple Store and as a download for Windows. The usual price for an all-inclusive subscription is $99.99 and gives you a lifetime license to use the product and all its future versions.
This is the software that most FPV creators with a Gopro use to make their videos look seamless and professional. It is easy to use and has the following features according to the manufacturer:
How to use ReelSteady?
The setup is very simple. Simply drag and drop your Gopro files and set the level of stabilization you want to apply to your videos.
A few tips on how to achieve the best effects with this tool:

Insta360 Studio
If you use Insta360, you probably already have their software. This allows you to set up the stabilization you need from the camera in post-production. Depending on the camera you are using, there are a number of modes:
A few things that will make your footage look even better and make editing easier:

Another advantage of these settings is that you can use them during filming and change everything again in post-production. So don't be afraid to experiment a little.
That's all well and good, but I'd like to have an alternative.
Fortunately, there is a remedy in the form of software that can stabilize shaky videos in post-production. I'll limit myself to my 3 favourites here:
Final Cut Pro
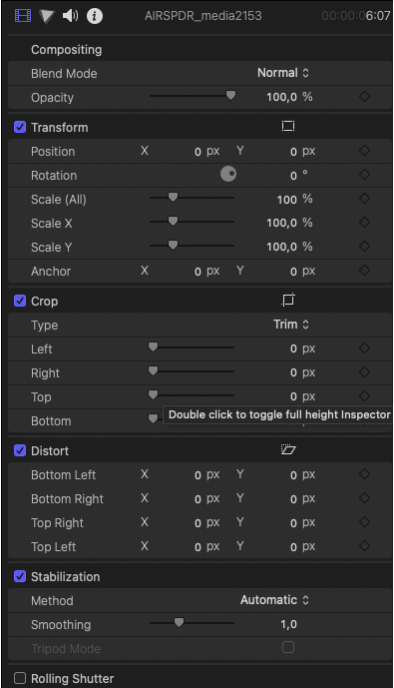
This is a comprehensive video editing program for advanced users and professionals, designed for Mac systems. Final Cut Pro has a built-in stabilization mode that is one of the best I've seen. You can edit the shaky footage of a clip by correcting the stabilization, rolling shutter or both.
The stabilization function in Final Cut Pro reduces the camera movement in your video so that shaky parts can be played back more smoothly. You have the choice between 3 settings: Auto, SmoothCam and InteriaCam. I usually leave the setting on Auto, but use Smoothcam most often for FPV.
Disadvantage: Final Cut Pro costs several hundred euros.
Adobe Premiere Elements
Adobe Premiere Elements is a video editor known for its professional editing functions, which you can use to stabilize your shaky videos, among other things. The program is available outside the Creative Cloud for a one-off payment.
How to use the WarpStabilizer:
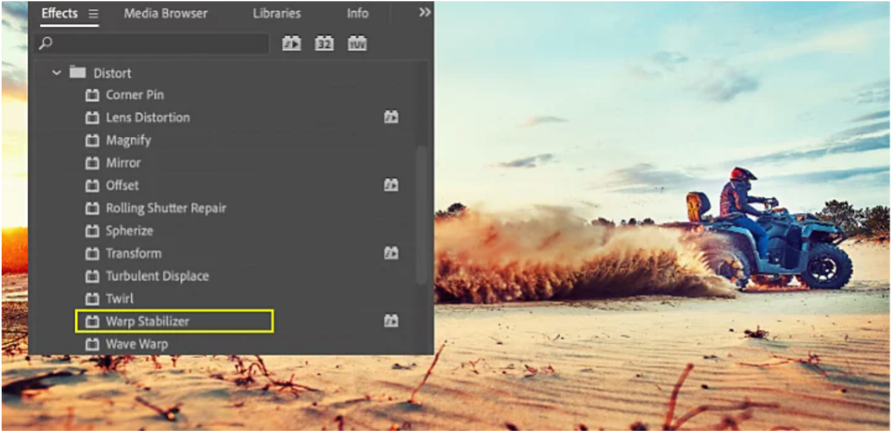
First select the clip you want to stabilize. Then select the Warp Stabilizer sub-item in the Distort effects panel. Apply the effect by double-clicking or dragging it onto the clip in the timeline or in the effect control window. Once the effect has been added, the clip will immediately begin to be analyzed in the background. Bear in mind that this may take a while depending on the size of the clip. You can follow the progress of the process in the project window. While this analysis is running, you can continue working elsewhere in the project.
As soon as the stabilizer has finished its work, you can check your work and make adjustments. For example, if the stabilization has caused the desired edge material to be lost, you can adjust the frame to restore it.
Davinci Resolve
Last but not least, there is Davinci Resolve, an application for colour grading, colour correction, visual effects and video editing for MacOS, Windows and Linux. Resolve's stabilizer works in a similar way to Adobe Premiere's WarpStabilizer.
The advantage here: The Da Vinci Resolve editing software is completely free for private users.
You can find the stabilizer in the Edit tab in the Resolve Inspector. The clip to be stabilized must be in the timeline. If you select the clip in the Media Pool, the Stabilization item will not appear in the Inspector.
There are 3 stabilization modes in DaVinci Resolve, which are different algorithms that are used to stabilize your footage. Which tool you should use always depends on your footage.
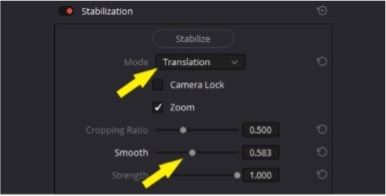
The other settings also offer additional functions. The standard settings usually produce good results, but feel free to play around with the individual parameters.
Conclusion
You can often save shaky video material with a stabilizer. After a while, you will get a feel for the material and the stabilizer. Then you will be able to recognize what can be compensated for and what is too shaky when shooting.
See you soon, Lexie!
Du möchtest immer auf dem Laufenden bleiben?
Dann abonniere jetzt unseren FPV24 Newsletter!