Disclaimer: This article is intended solely to answer the most frequently asked questions about FPV drone videos. It is not a professional training or tutorial to learn a profession. Have fun reading!
Do you want to get into cinematic FPV? Even though technology has evolved and it is now possible for anyone to take beautiful pictures and videos, there are still some important basic concepts for creating your cinematic FPV shots. This article does not purport to teach you a craft. However, it should enable you to understand the basics of a good video and film appealing video clips. Before we talk about equipment and settings, it's worth remembering that a good video is created primarily by good light, a good subject and an appropriate quad. No wonder, because without good light you won't be able to take beautiful pictures. The choice of camera is also important. But contrary to what you might think, it is also possible to take very good pictures with inexpensive cameras.
Choosing your camera
As for the choice of camera, here is a list of 3 cameras that we think are benchmarks in their price range.
Settings of your HD camera for FPV drone videos
FPS:
All videos consist of a series of still images that, when viewed in a specific order and speed, create the impression of movement. The frame rate, in turn, is the speed at which the individual images are shown and is measured in frames per second (FPS). Each image is one frame. If a video is recorded and played back at 24 FPS, 24 still images are shown every second. 24 FPS is the "normal" rate for movies, for example.
Which frame rate offers the best video experience is controversial and also a matter of taste. Different frame rates have an effect on the result. Videos with a lot of movement, such as sports events, are recorded at a higher FPS. This is because many things happen at once and with a higher frame rate the video is played back smoothly and all details are razor sharp.
Recordings with more than 30 FPS are mainly used to create slow-motion videos. But be careful: filming in 60 fps also has disadvantages. The higher the frame rate, the more images are packed into each second of the video. More frames means more information to process, which in turn means larger files and longer export times.
If you want to shoot in slow motion, you need to have more FPS set than your final rendering. So if you want to render at 30 FPS, it is advisable to film at 60 FPS - at least in the scenes that are to be slowed down - so that slow motion is possible at half speed.
Rendering means "transmission" or "playback" in German. In very simple terms, the previously recorded data sets are converted into two-dimensional images. Specific properties are transferred to the raw data in a complex computing process. The end result is an image format that is reproduced with all the defined specifications.
The image resolution
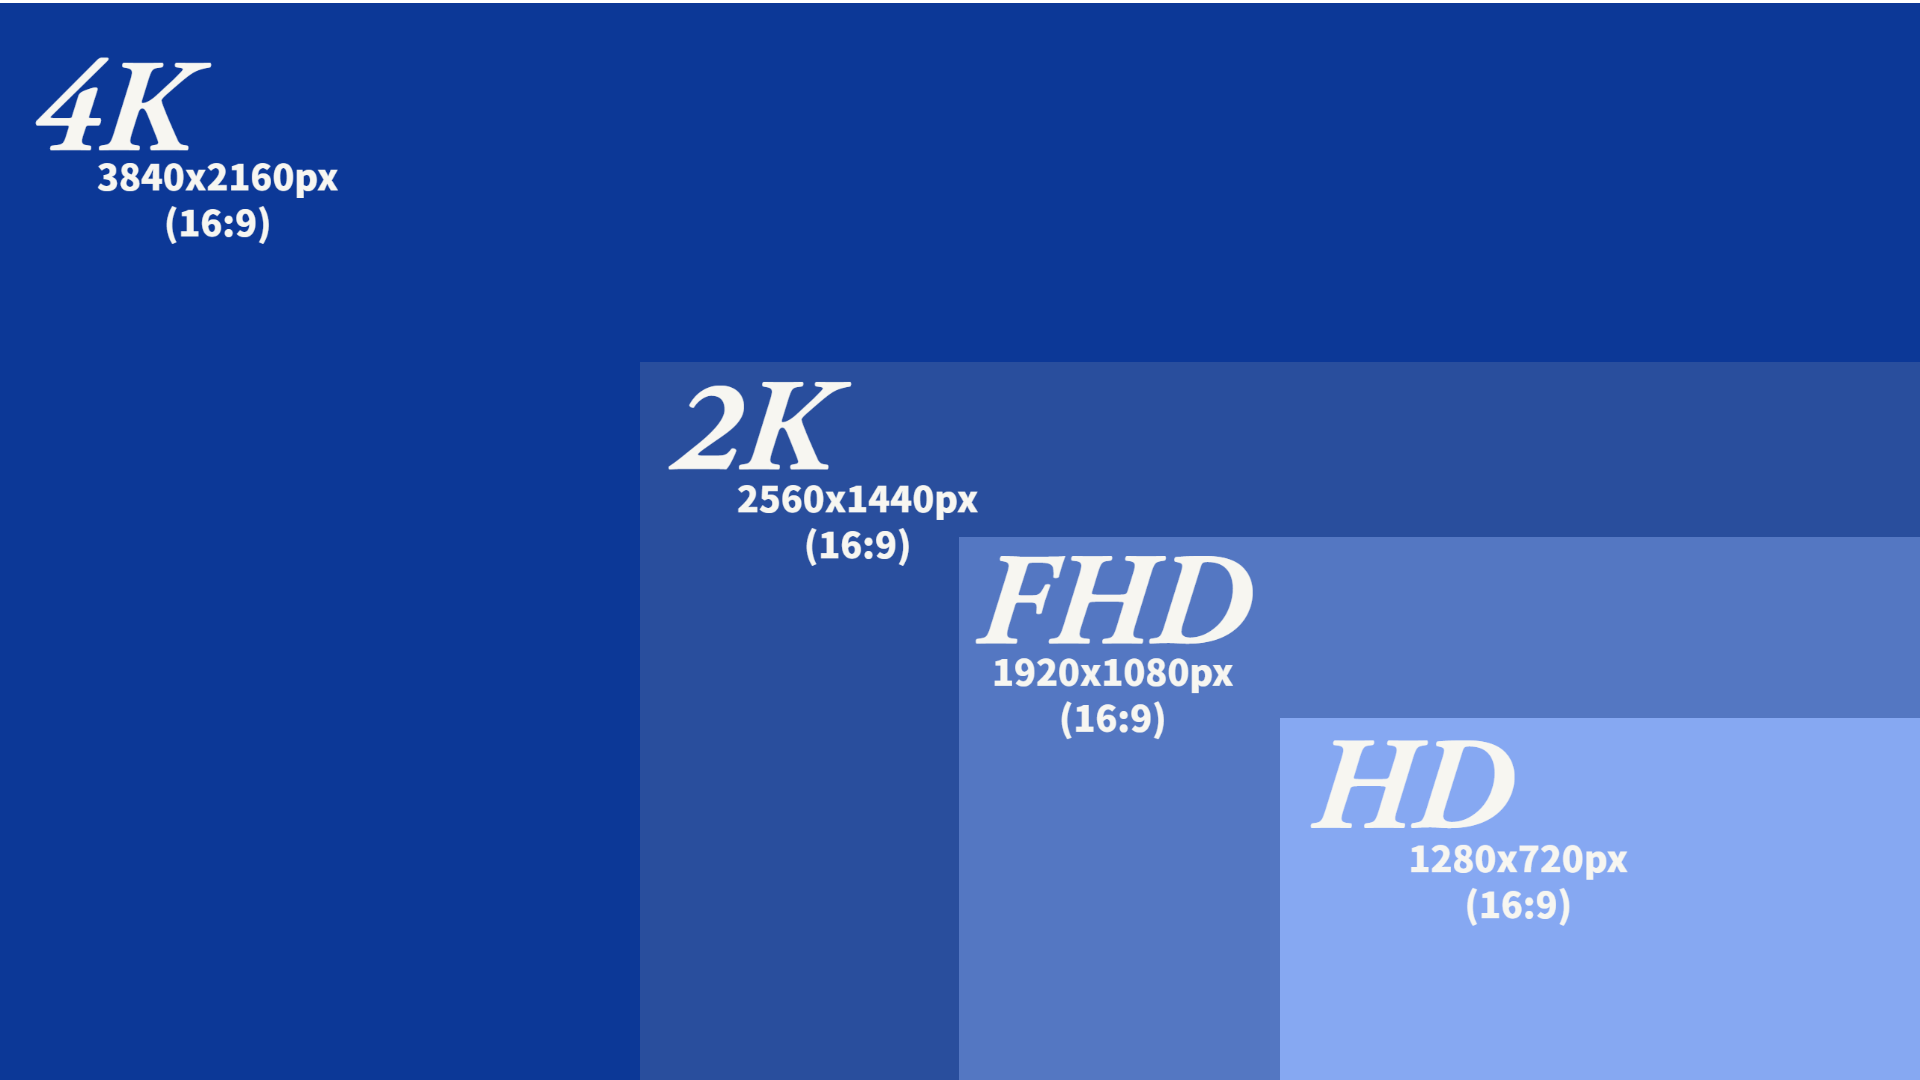
The video resolution determines how detailed or realistic a video is displayed. It is measured by the number of pixels in the aspect ratio of 16:9, the most common aspect ratio for televisions and computer monitors. A high pixel count means high resolution, a low pixel count means low resolution. 1080p? 2k? 4k? Our tip: Choose a resolution one level higher than the rendering resolution. This way you can crop and edit your video without degrading the image.

The resolution you use should depend on the intended output format. If you know in advance that your project is limited to a YouTube video with a maximum display resolution of 1080px - i.e. FullHD - you should not waste time and resources with video files in 8K. Nevertheless, make sure that the resolution is large enough for the various formats in which the video is to be published.
Our tip: Try out different resolutions.

The shutter speed
Shutter speed is the speed at which your camera's shutter closes. A fast shutter speed creates a shorter exposure or amount of light that is captured by your camera. Alongside the aperture and ISO number, the shutter speed is a key parameter in controlling the brightness of the image. A faster shutter speed (1:120) produces a very sharp image, while a slower shutter speed (1:60) produces more motion blur. While shutter speed is measured in fractions of a second, most cameras display it as a whole number.
ATTENTION: The lower the shutter speed, the more light enters the sensor! The lower the shutter speed, the more "motion blur" there is. As a rule of thumb, you should always select twice the shutter speed of the FPS. So with 30fps recording 1/60 shutter speed, with 24fps usually only 1/50. This sounds good at first, but more light enters the sensor which can lead to overexposure of the image. This phenomenon can be compensated for with an ND filter. Read more about ND filters here.
The white balance
The white balance is used to adjust the camera's recording material to the colour temperature of the light at the shooting location. The fully automatic white balance is without doubt the most convenient for us - but also the most prone to errors.the fully automatic white balance often fails when shooting in twilight and changes during the shoot.
You can often set the white balance completely manually and then set the white balance colder in warm light. In cold light, you react with a warmer white balance. The aim is a neutral image with realistic colors. Many cameras also offer different settings:
Just play around a little to find out which result you like best.
The ISO sensitivity

ISO originally refers to the light sensitivity of analog film. When we talk about digital cameras, "ISO" is the abbreviation for "ISO 12232:2006", which is a technical standard. Digital ISO is supposed to mimic analog (film) ISO. Roughly speaking, the higher the light sensitivity of a digital camera, for example, the better you can photograph and film with it in darker environments. A big advantage of digital photography: with digital cameras, the ISO setting can be changed from image to image.
As a general rule and depending on the style you want to achieve, you should choose the appropriate ISO value based on your lighting settings and your shutter and aperture settings.
| ISO sensitivity | Shooting situation |
|---|---|
| 100-200 ISO | Shooting in sunlight |
| 400-800 ISO | overcast sky, evening |
| > 800 ISO | at night or in dark interiors |
Small numbers therefore indicate that the image sensor is not very sensitive to light. And the higher the ISO number, the more the image is processed. The higher the quality of the camera, the higher the ISO value you can achieve without degrading the image. It is also usually recommended to have fixed ISOs. The variation of an automated ISO setting in a video is often visible.
ND filters
These small opaque filters, which act like sunglasses, allow you to maintain a high quality image with motion blur without overexposure.
You can find out more about ND filters in this blog post.
Post-production/post-processing
Ok, so now you've flown and shot beautiful drone videos. Now what? How can you post-produce your videos? What should you do with all that footage now? How can you create a worthy movie that looks amazing? Let's explore the post-production workflow that will help you create a beautiful video clip.
Before you start your project, think about what kind of movie you want to create. For example, a slow, cinematic style movie or fast, jerky cuts, creative transitions. More of a social media clip or perhaps a video of a journey with occasional ground shots and people shots.
Software
Post-production includes all the steps involved in editing a film. This includes video editing, color correction, color grading and sound mixing. You need the right software for this, and choosing the right software for editing is crucial. Some of the big names include Adobe Premiere Pro (free, Windows, Mac), Final Cut Pro (free, Mac), Davinci Resolve (free and paid, Windows, Mac) and Blender (free, Windows, Mac). When choosing the right software, think in advance about what you want to do with your videos. If you only need simple editing, light correction, etc., most software is fine. However, if you want to do professional grading, VFX and further enhancements or corrections to your footage, you will need more sophisticated software.
Color grading and color correction
Color grading usually includes the editing of brightness, contrast and sharpness to a natural standard. Color grading is the artistic part of every film and gives the film its character.
Color grading is a creative part of post-production and uses colors to convey the feeling of the respective scene and the video - from dramatically cold (e.g. blue/green tones) to emotionally warm (e.g. yellow tones). For example, a leap in time from morning to evening can be indicated by appropriate color changes and different looks.
Image stabilization
ReelSteady Go is a very simple tool for the subsequent stabilization of GoPro action footage - older cameras up to the Hero 5 (including the Session) are also supported. Find out more about ReelSteady and other alternatives here. In addition to the gold standard ReelSteady for GoPros, there are also integrated stabilization tools in various editing software. These often achieve different results because they analyse the image itself and not the gyro data as with ReelSteady.
You can find out more about this topic here:
Audio
The soundtrack of a video is very often underestimated. In fact, it is a crucial part that will radically change the way your video is perceived.
When it comes to editing music, there are two approaches to adding sound to a short drone film. First: you select an existing piece of music and adapt it to your clip. Second: you create the video first and then compose the music to match the video (or have it composed). But let's be honest - most of us probably can't (and don't want to) afford the second method for our hobby.
There are some good platforms where you can get music and SFX. E.g. Envato Elements, Artlist or Epidemicsound.
Here you can simply browse through the offer and filter by mood if necessary.
When editing, you first bring the audio track to the desired length and then cut the scenes of your video to the beat. Occasionally you can support the process with SFX, e.g. wooshes when you fly close to something. ATTENTION: Do not overdo it! Turn down the volume of the SFX before you render the video.
Conclusion
Despite all the rules and general truths, you will have to experiment with different settings before you achieve the desired result. We can only advise you to be patient and not be afraid to play around with all the settings. It's worth the effort, because your videos will get better and better with time and practice.
Send us your videos via YouTube with the hashtag #fpv24 in the title.
Du möchtest immer auf dem Laufenden bleiben?
Dann abonniere jetzt unseren FPV24 Newsletter!