Most FPV pilots have been using OpenTX for ages. It is the operating system that is installed on most remote controls. Unfortunately, the development of this firmware has slowed down considerably over the years. We pilots often wait a long time for new features and updates.
This is understandable, of course, because it is an open source project and the developers are probably busy with their regular tasks. This is how EdgeTX was brought to life and has sparked the interest of FPV pilots around the world with its long-awaited features! (For me it was the touchscreen, I love my touchscreen)
Many now want to upgrade from OpenTX to EdgeTX. But is it safe to flash EdgeTX to a remote control with pre-installed OpenTX? Absolutely! In this blog post I will guide you step by step through the whole process.
Before I explain how you can flash EdgeTX to your radio, it probably makes sense to tell you why it makes sense to upgrade to EdgeTX. That way you can then decide for yourself whether you want to upgrade - or not. Personally, I don't like flashing my spark, so I only do it for really important new features. As I mentioned in the introduction to this blog post, thanks to EdgeTX you can now finally use the touchscreen on the TX16S from RadioMaster. I know it may not seem like "much", but you'll be surprised what a difference the touchscreen makes.
Edge TX also has "Theme Support", which means you can customize the menu design of your radio. There is even a whole theme library online where you can download ready-made designs.
In addition, the widgets that you can display on the screen have been improved and can be made full screen.
Of course, there are also many other improvements and bug fixes. You can take a look at the new features of the latest version here: EdgeTX Latest Release on GitHub
That all sounds good? Then you can get started now!
This tutorial was made on the RadioMaster TX16S, but will work for all other remote controls with a screen. Partly also for remote controls without a screen.
EdgeTX also supports ELRS or ExpressLRS and the Crossfire protocol (CRSF). However, CRSFv3 is not yet supported.
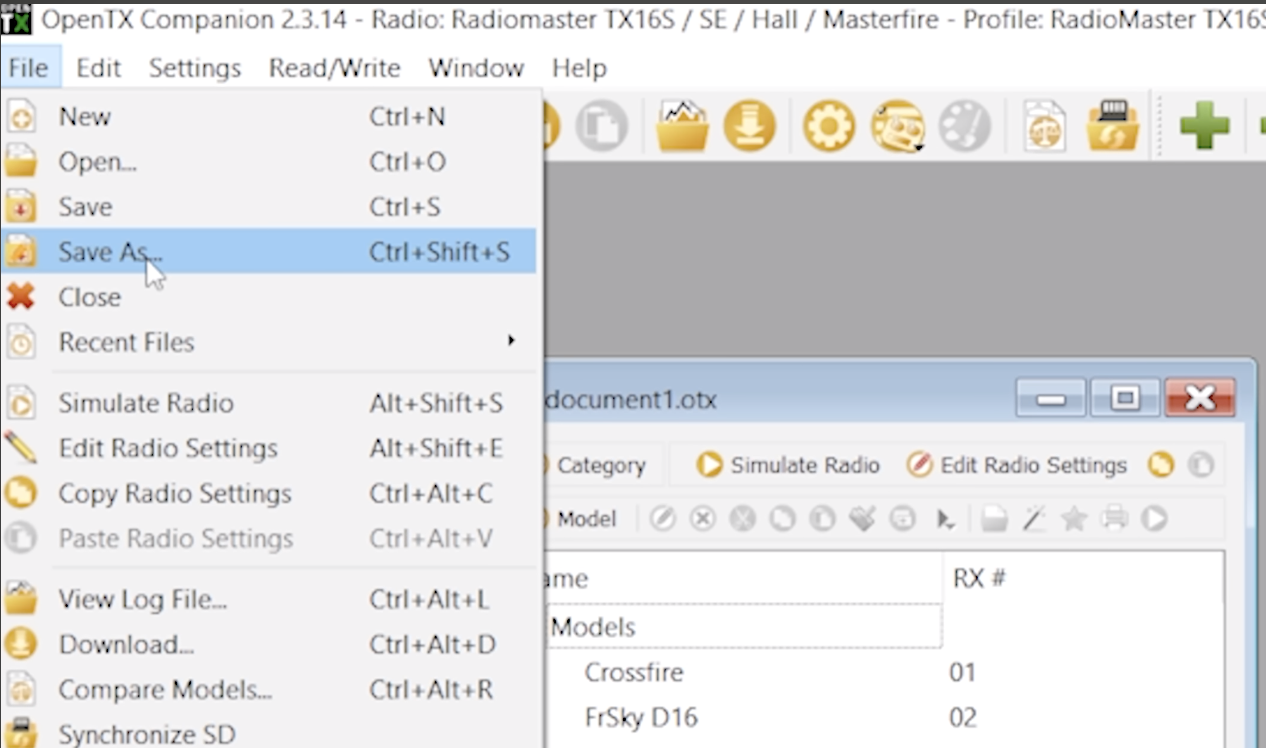
Before you make any changes to your remote control, you should make a backup of your models and settings. This will make things easier should problems arise later.
To get all the files you need, please go to http://edgetx.org/getedgetx and download the Companion or use the browser-based "Buddy". You can also download all the files that you might need. Including the sound packages.
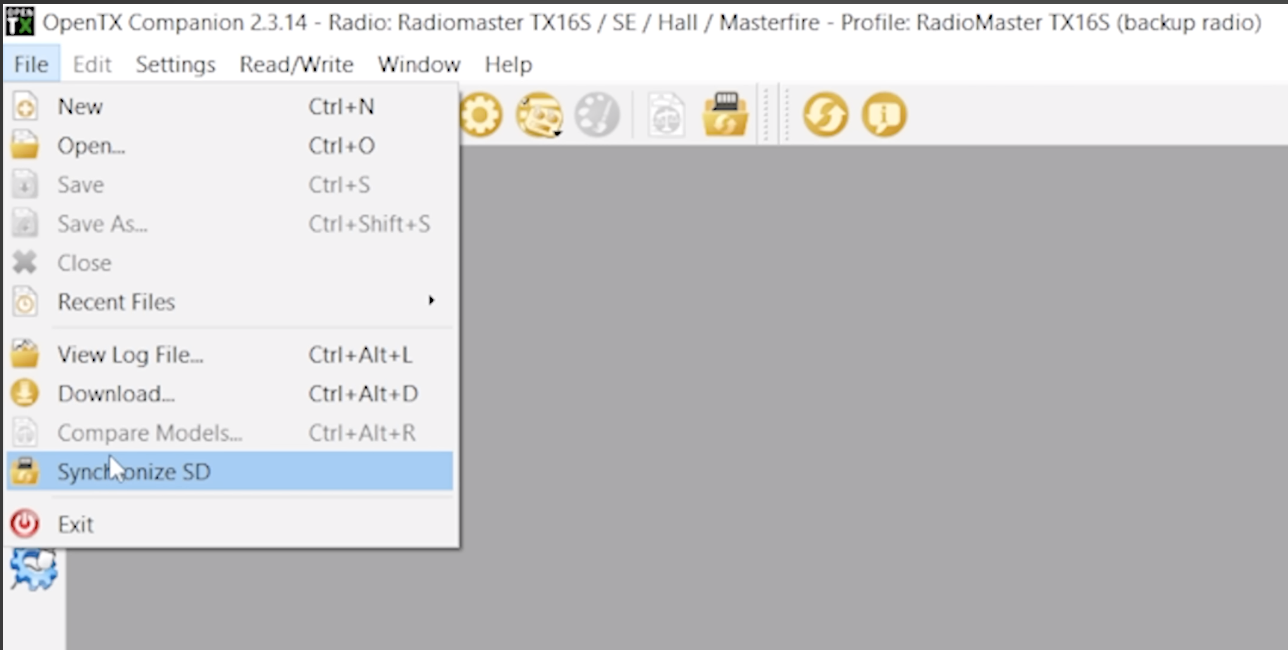
I usually start by copying the contents of the SD card to the SD card in the radio.
When you open the SD card on the computer (and open the files from EdgeTX), make sure you deselect MODELS and RADIO (especially if you already have some models installed). If it is a new spark that you have just taken out of the box, this is not necessary. If you are using a special sound pack or graphics - deactivate these too.
Delete everything that is selected on the SD card.
Once the SD card is empty, take the contents of the .zip file from EdgeTX and copy it to the SD card.
Your SD card is now ready for the installation of EdgeTX!
Download the EdgeTX firmware.
If you are not using the Companion/Buddy, you can simply copy the firmware to the "FIRMWARE" folder on your radio.
Now switch on your remote control. There will be some warning messages. Don't worry about this and long press the SYS button (or the MENU button) and scroll to the SD card. Click to go to the firmware folder and highlight the file you put there before (.bin). Long press and click on "Flash bootloader".
As soon as this is done, switch off the radio.
Now you have to switch on the remote control in boot mode. To do this, normally press the right and left trim switches inwards and switch the device on. The EdgeTX bootloader will then be displayed on the screen. Select "Write Firmware", select the file and hold down the ENTER button until the process begins.
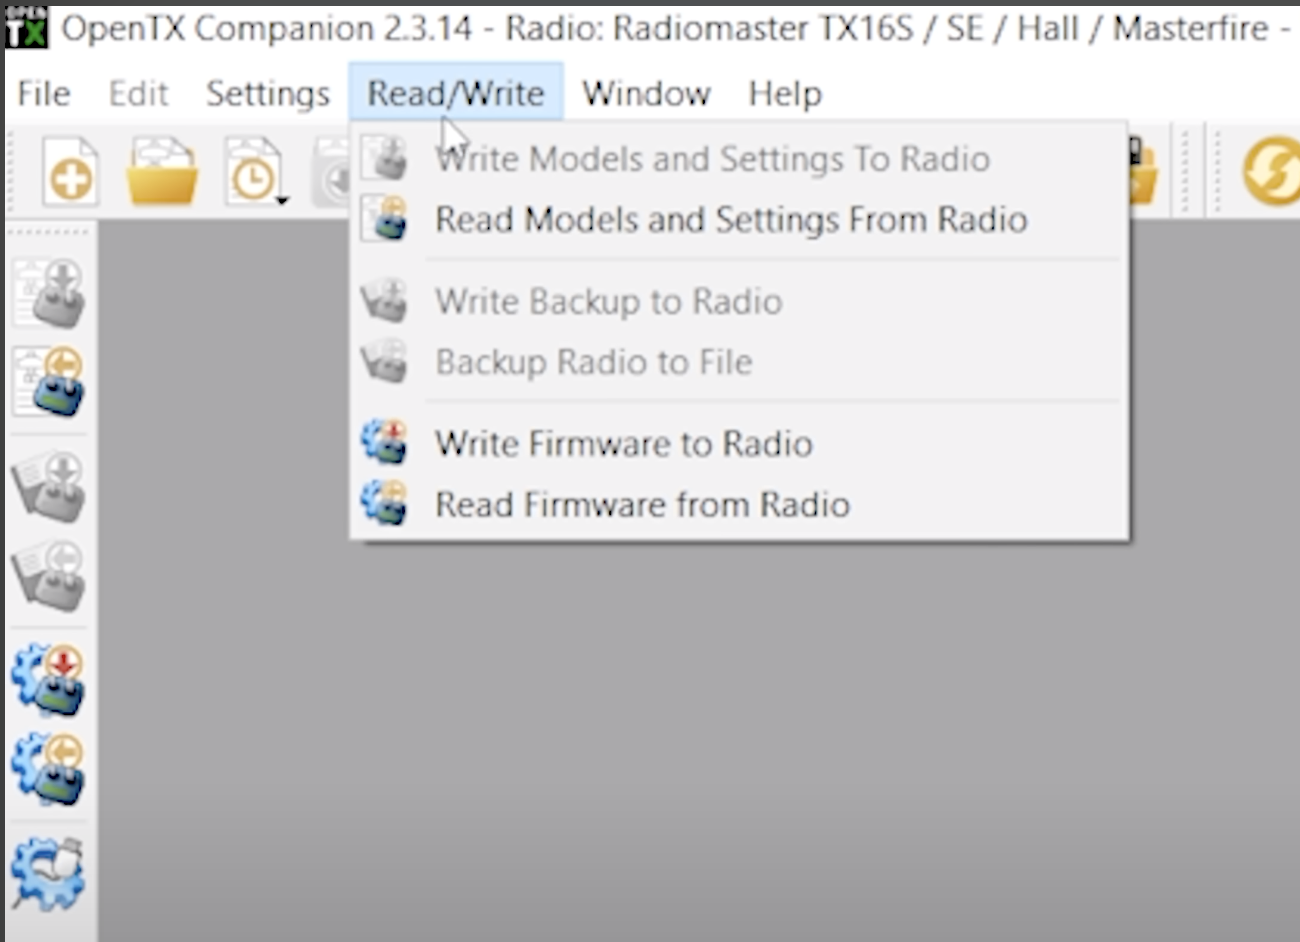
If you are using the Companion/Buddy (Only use if your radio is already running EdgeTX for upgrades) - Open the EdgeTX Companion, connect your radio to the computer. Select "Storage SD" on the pop-up screen and click Enter. Go back to the EdgeTX Companion, click on "Read/Write" and "Read models and settings from radio" if you wish to upgrade or simply click on "Write Firmware To Radio".
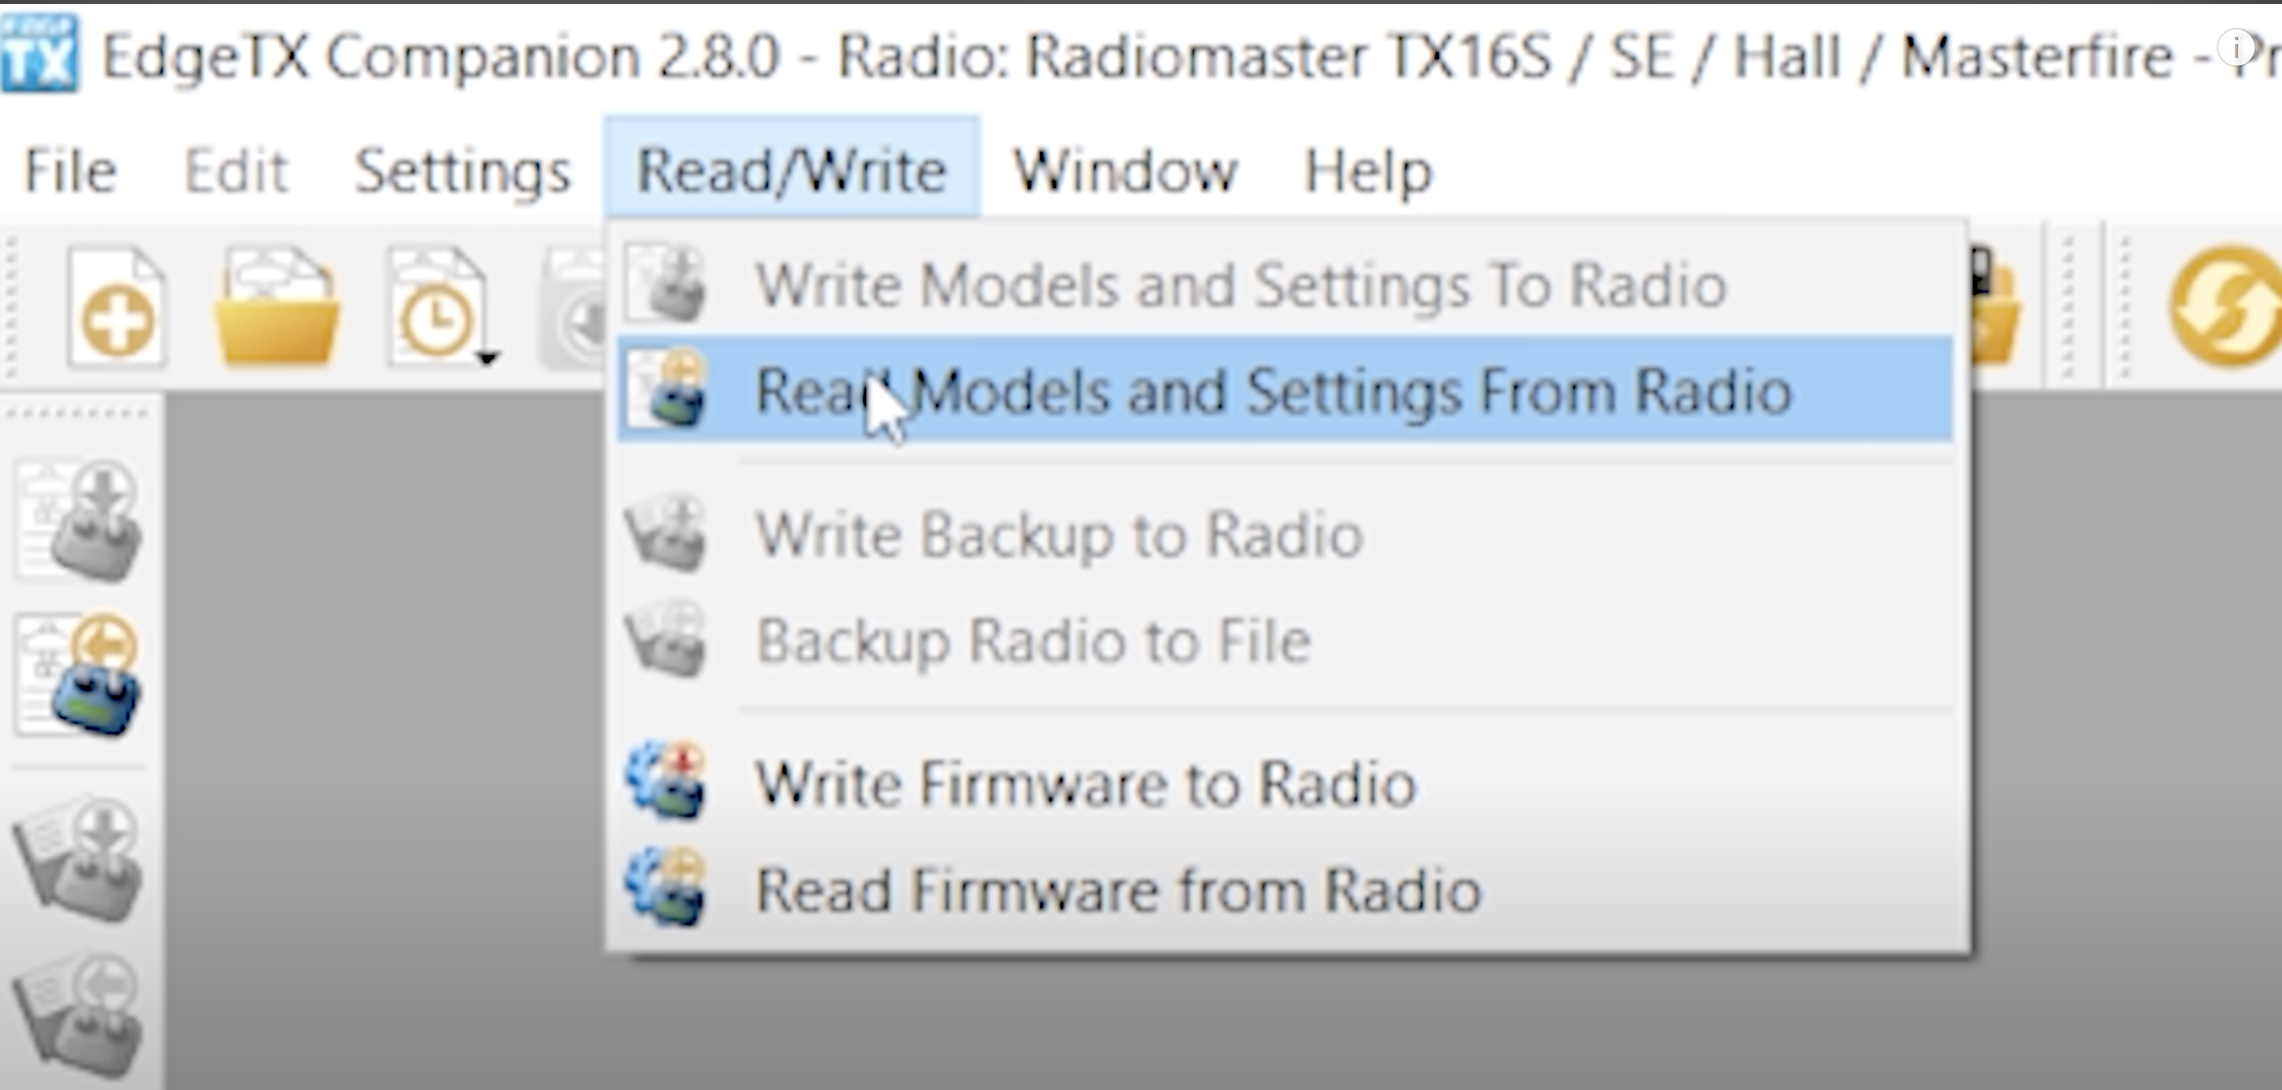
After your remote control has been upgraded to EdgeTX, you will need the EdgeTX Companion. Connect your radio, click on the memory SD, select "Read/Write" and click on "Write models and settings to remote control".
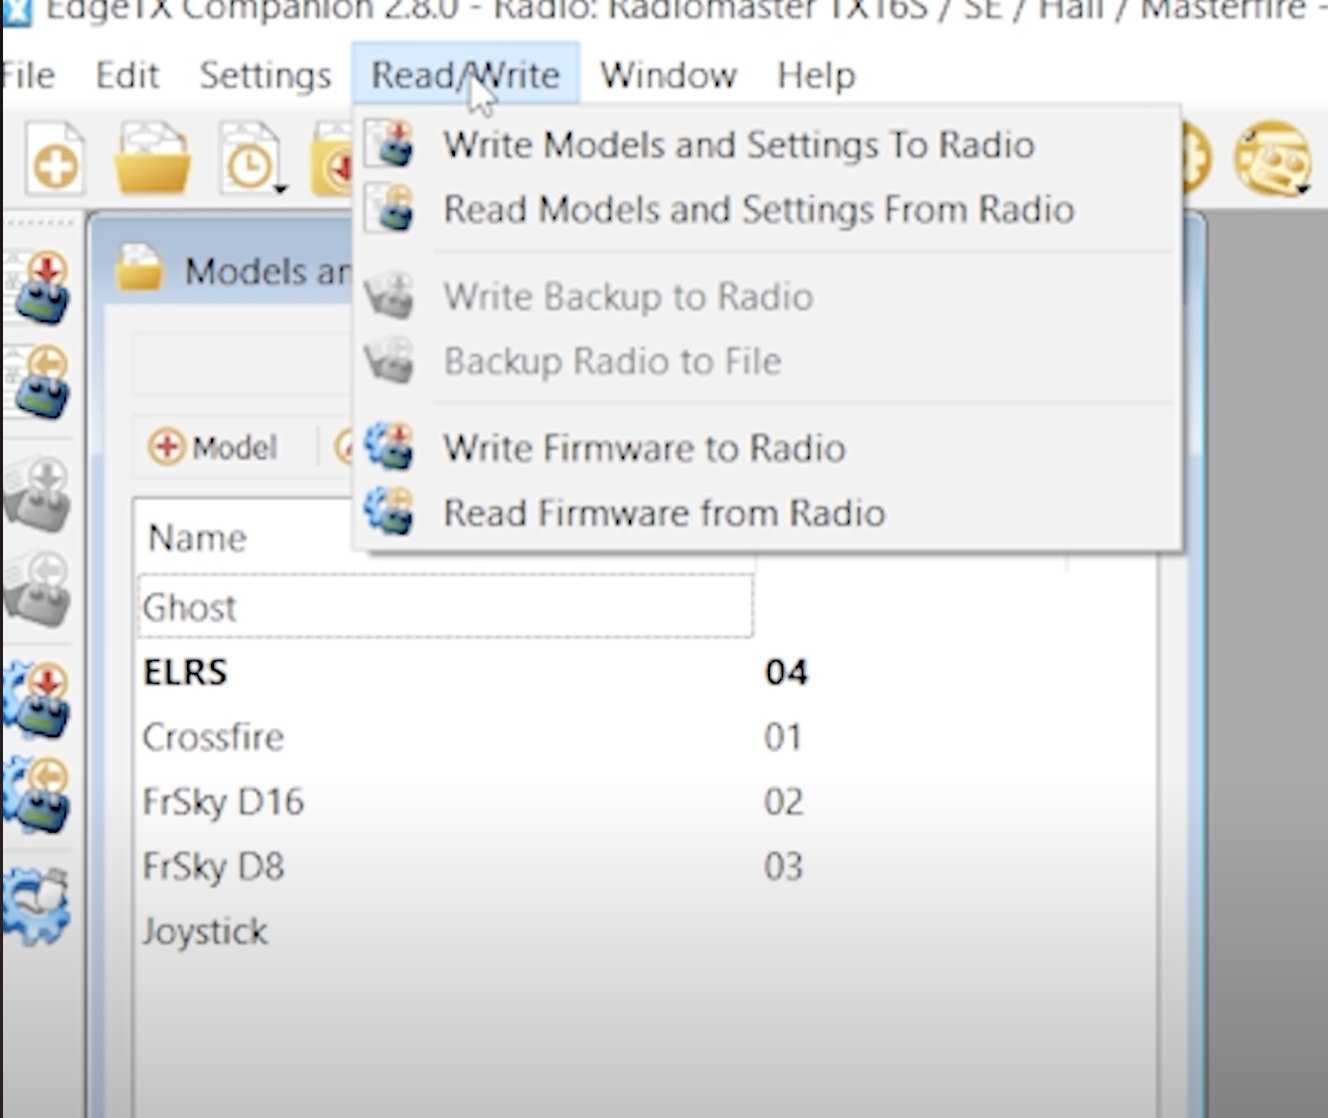
After you have selected the models and settings from the previously saved file, you should unplug your remote control and check that everything is as you remember it!
I hope this guide to upgrading from OpenTX to EdgeTX has helped you! Let us know if you have any questions or suggestions for new tutorials.
Happy flying!
Your Lexie
Du möchtest immer auf dem Laufenden bleiben?
Dann abonniere jetzt unseren FPV24 Newsletter!